
Guides
 Hench Skills
 Guides
1. After you create your account, download the client and start the game you will see the server selection screen.
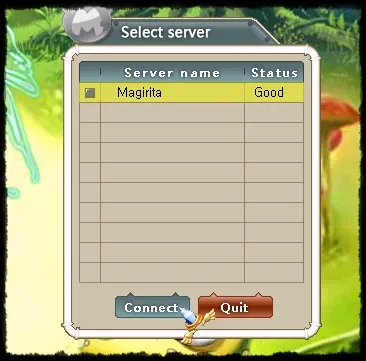
2. Select the server and after that it will be in the character creation / selection screen.
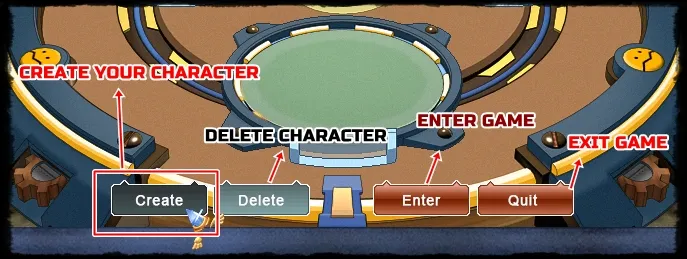
In the image above, you see the function of each button, click on 'CREATE' to create your first character.
3. A screen for character creation appears, select and choose the following items as per the image:

1 - Character's Name
2 - Hero's hair color
3 - Set the hero (Ditt, Jin, Penril or Phoy)
4 - Distribute the free points between the desired statuses.
5 - Confirm If all the information is correct, your character will be created.
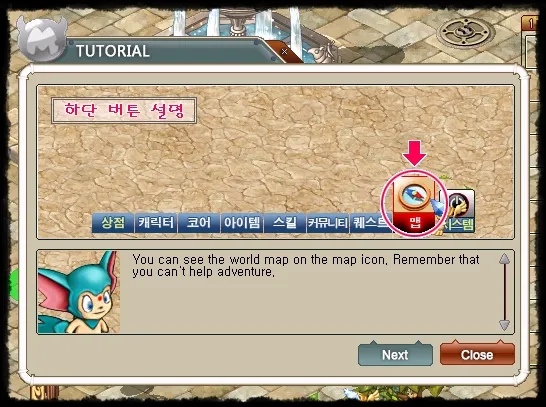
4. When you first enter the game you will be in the 'Tutorial Zone'

1 - Mini Map
2 - Latest important update notes.
3 - Character state area and henchs.
4 - Main menu
5 - Chat with the world / guild / group / private.
6 - Click to walk.
5. You can explore the map and learn a little about the world of MixMaster with Pacci and Professor Jove.
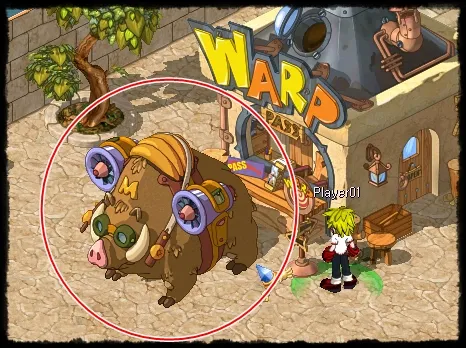
6. After completing the optional steps and learning more about the world, go to the [Monez] Warp, located at the purple dot of the map.
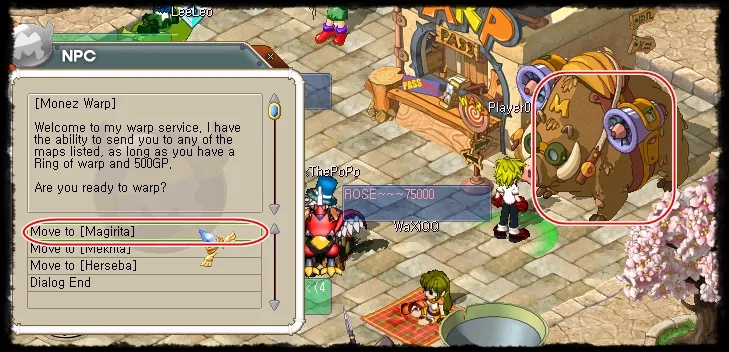
7. Talk to Monez and he will send you to the Battle Zone, outside Magirita, where most players focus on sales and battles.

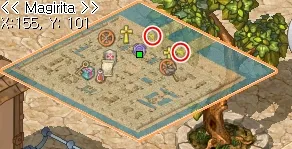
8. Again, talk to Monez and take a quick trip to Magirita, the initial city.
9. Already in Magirita, you can go to the north of the city to start fighting the monsters ...
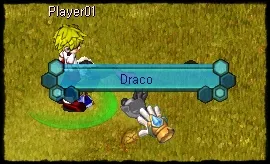
10. Click on the monsters to fight. After winning, you will gain experience points to pass the level. Monsters can also drop some items, gp (money) or their souls (called CORE).

11. If the monster drops its core, it means that you can use it as your adventure companion, it will battle by your side and will always be faithful and obedient. Of course, you can also trade it with other players.
There are over 1,000 monsters in the world of MixMaster, powerful and rare. The more powerful, the more valuable. Make it count!
12. By killing monsters you gain experience points and upgrade your hero level. Whenever you pass the level, you will earn status points to distribute and increase your hero's strength, vitality and agility, making him stronger.
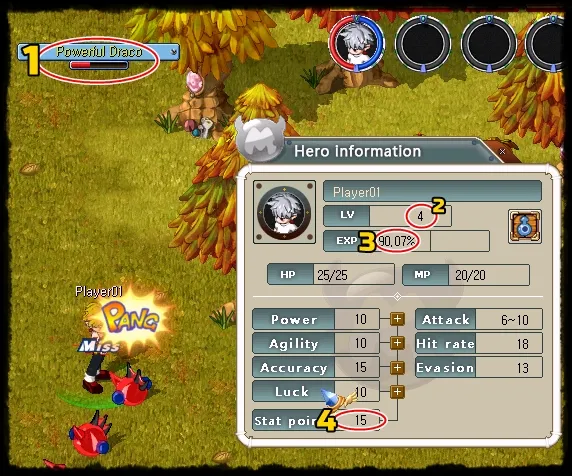
1 - Name / Remaining life of target hench / monster.
2 - Current level of the character.
3 - Progress to the next level.
4 - Points available to distribute in status.
13. When a monster drops its core, it will come dead to your inventory, you must take it to the city's Mix Builder to recovery it and use it.
14. The Mix Builder is located in all major cities and you can see their location by the orange dot indicated on the map. Talk to the NPC and click on the core recovery option.
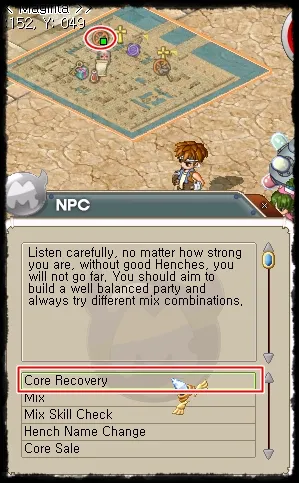
15. For each recovery, a GP fee will apply, which may vary depending on the level and strength of the hench.
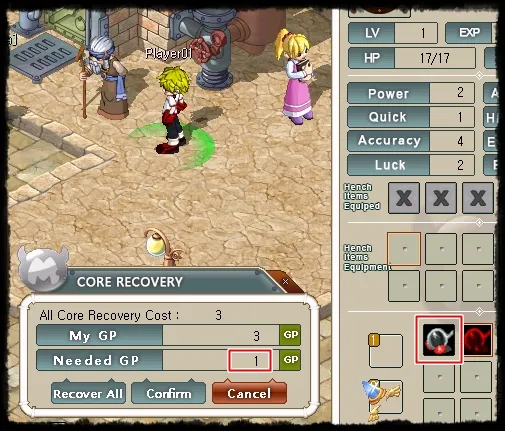
16. After recovering your monster, you can now use it as a companion. Double click and it will follow you wherever you go. It will also attack your enemies whenever you command it.
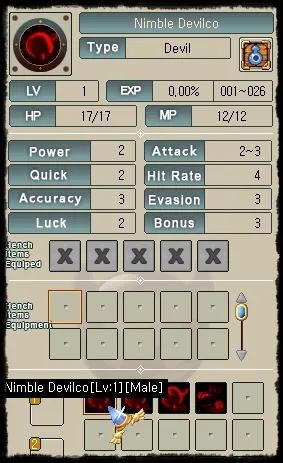
1 - Space defined for allocation of first Hench. (You can use up to 3 at a time)
2 - The henches you use also have HP (health points) and MP (magic points). You must ensure that your points do not reach zero during battle. If so, you can revive them again using Mix Builder.
3 - Your hench will follow you wherever you go. But remember: you can only use henches that are up to 15 levels higher than yours. Very powerful henches are impossible to control at low level.
2. Select the server and after that it will be in the character creation / selection screen.
In the image above, you see the function of each button, click on 'CREATE' to create your first character.
3. A screen for character creation appears, select and choose the following items as per the image:
1 - Character's Name
2 - Hero's hair color
3 - Set the hero (Ditt, Jin, Penril or Phoy)
4 - Distribute the free points between the desired statuses.
5 - Confirm If all the information is correct, your character will be created.
4. When you first enter the game you will be in the 'Tutorial Zone'
1 - Mini Map
2 - Latest important update notes.
3 - Character state area and henchs.
4 - Main menu
5 - Chat with the world / guild / group / private.
6 - Click to walk.
5. You can explore the map and learn a little about the world of MixMaster with Pacci and Professor Jove.
6. After completing the optional steps and learning more about the world, go to the [Monez] Warp, located at the purple dot of the map.
7. Talk to Monez and he will send you to the Battle Zone, outside Magirita, where most players focus on sales and battles.
8. Again, talk to Monez and take a quick trip to Magirita, the initial city.
9. Already in Magirita, you can go to the north of the city to start fighting the monsters ...
10. Click on the monsters to fight. After winning, you will gain experience points to pass the level. Monsters can also drop some items, gp (money) or their souls (called CORE).
11. If the monster drops its core, it means that you can use it as your adventure companion, it will battle by your side and will always be faithful and obedient. Of course, you can also trade it with other players.
There are over 1,000 monsters in the world of MixMaster, powerful and rare. The more powerful, the more valuable. Make it count!
12. By killing monsters you gain experience points and upgrade your hero level. Whenever you pass the level, you will earn status points to distribute and increase your hero's strength, vitality and agility, making him stronger.
1 - Name / Remaining life of target hench / monster.
2 - Current level of the character.
3 - Progress to the next level.
4 - Points available to distribute in status.
13. When a monster drops its core, it will come dead to your inventory, you must take it to the city's Mix Builder to recovery it and use it.
14. The Mix Builder is located in all major cities and you can see their location by the orange dot indicated on the map. Talk to the NPC and click on the core recovery option.
15. For each recovery, a GP fee will apply, which may vary depending on the level and strength of the hench.
16. After recovering your monster, you can now use it as a companion. Double click and it will follow you wherever you go. It will also attack your enemies whenever you command it.
1 - Space defined for allocation of first Hench. (You can use up to 3 at a time)
2 - The henches you use also have HP (health points) and MP (magic points). You must ensure that your points do not reach zero during battle. If so, you can revive them again using Mix Builder.
3 - Your hench will follow you wherever you go. But remember: you can only use henches that are up to 15 levels higher than yours. Very powerful henches are impossible to control at low level.